[SAML Test] 1. Setup a Single Sign On SAML Test Environment with Docker and NodeJS
Setup a Single Sign On SAML Test Environment with Docker and NodeJS
I’m Jeffry Houser, a developer from the Polaris team in the content engineering group at Disney Streaming Services. My team builds…
medium.com
Defining Terms
The first time I was exposed to it; SAML was difficult for me to get my head around. As such, I’m going to start out with some definitions that will help you understand the pieces of a SAML application.
- Single Sign On (SSO): Any system that allows authentication code and login data to be shared across multiple applications.
- Security Assertion Markup Language (SAML): A framework, and XML schema, for implementing Single Sign On.
- Principal: The user who is attempting to gain access to our application.
- Assertions: Data about the principal which are included as part of the SAML response. Samples of this might be the user’s name, or other permission data.
- Service Provider (SP): This is the application, or system, that the user is attempting to access. We will build a simple SP as part of this article.
- Identity Provider (IdP): This is a remote application, or system, that authenticates the user and returns data back to the service provider. We’re not going to build an IdP from scratch, but I’ll show you how to set up and use a pre-built one.
- Globally Unique Identifier: A value that the IdP will use to identify an SP.
Knowing the definitions is a great start but knowing how these pieces work together is even more important and I’ll go over that next.
Review the Application Flow
This is a common flow for a SAML application:
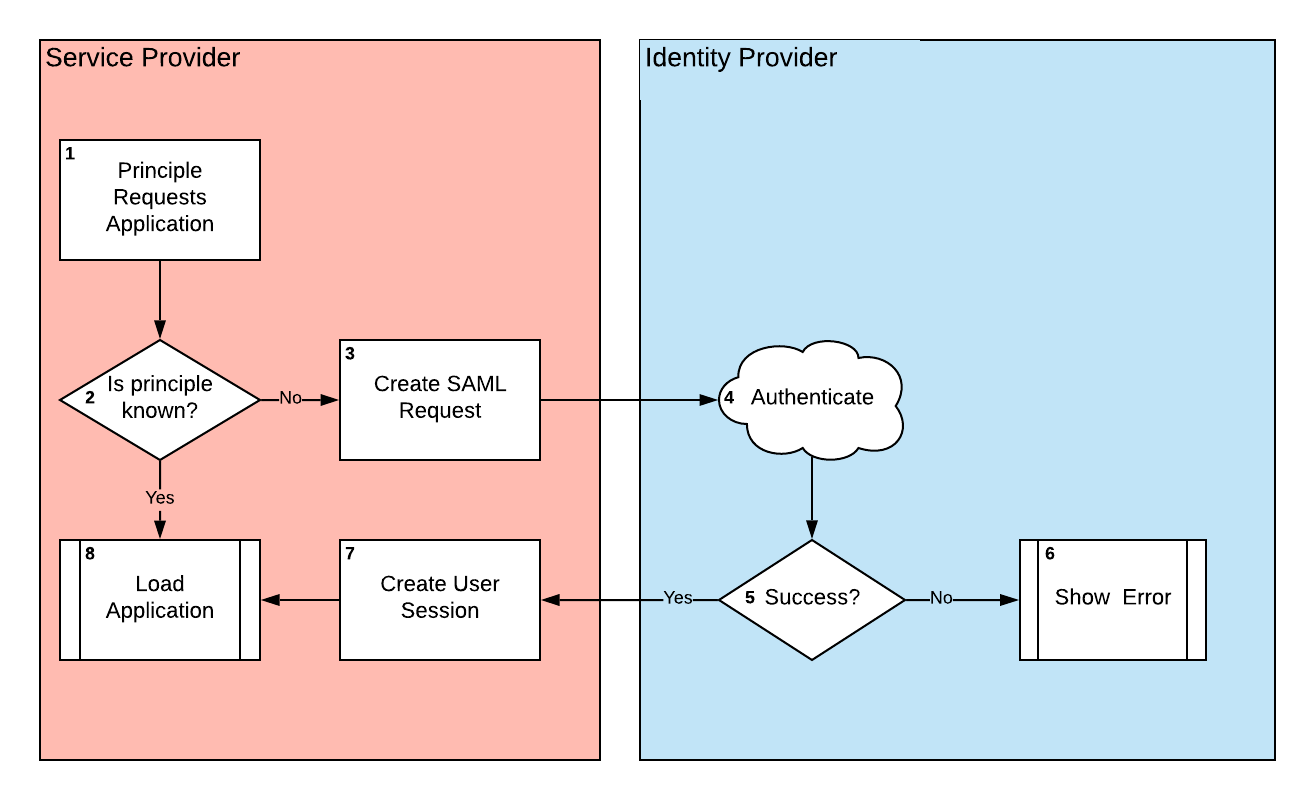
Let’s follow the flow:
- The Principal — AKA User — tries to access your Service Provider — AKA your application.
- The Service Provider checks to see if it knows the Principal. In a browser-based app, this session information would probably be stored as a cookie, but a desktop or application server may store that information in memory. If the user is known, we can load the app normally, so move onto step 8. If the user is not known, jump to step three to start the authentication process.
- If no user is known, the SP creates a SAML Request and sends that request to the IdP. This request will contain the Globally Unique Identifier so that the IdP knows which application the principal requested access to.
- Now the IdP handles the request. It will authenticate the user. It may do this based on an existing session from a previous sign in, or it may have the user login anew.
- Did the IdP successfully collect user details on the Principal? If so, go to step 7, the success set. Otherwise go to step 6 the failure step.
- If the Principal was not able to login, the IdP will handle authentication errors and the SP will know nothing about the failure.
- If the IdP successfully logged the user in, it will create a SAML response packet, including assertions about the user, and send the info back to the SP’s callback URL. The SP will use that data to create a user session.
- If the Principal authenticated properly, then load up the app and let them in.
The rest of this article will focus on steps 3 through 7.
Install Prerequisites
You’ll want to install a prerequisites before we start jumping into the code:
- Docker: Docker is a container platform that lets us easily create virtual machines with predefined code. We’re going to use it to easily create our own Identity Provider.
- NodeJS: We are going to write our Service Provider from scratch using a NodeJS and some common plugins.
- OpenSSL: OpenSSL can be used to create public and private key certificates for. Certs like these are often used for SSL on web sites, but we’re going to use them to encrypt and decrypt the packets we’re sharing between our SP and IdP.
'IT > 기타' 카테고리의 다른 글
| [SAML Test] 4. Service Provider 생성 및 테스트 (0) | 2020.09.07 |
|---|---|
| [SAML Test] 3. Setup our Identity Provider (Docker환경에 설치) (0) | 2020.09.07 |
| [SAML Test] 2. CentOS 8 nvm을 이용한 node.js 설치 (0) | 2020.09.07 |
| Jira API token 생성 (Issue does not exist or you do not have permission to see it) (0) | 2020.06.23 |
| Jira 설치 (docker) (0) | 2020.06.23 |
[SAML Test] 2. CentOS 8 nvm을 이용한 node.js 설치
1. nvm설치
- wget -qO- https://raw.githubusercontent.com/nvm-sh/nvm/v0.35.2/install.sh
[root@localhost ~]# wget -qO- https://raw.githubusercontent.com/nvm-sh/nvm/v0.35.2/install.sh | bash
=> Downloading nvm from git to '/root/.nvm'
=> '/root/.nvm'에 복제합니다...
remote: Enumerating objects: 288, done.
remote: Counting objects: 100% (288/288), done.
remote: Compressing objects: 100% (254/254), done.
remote: Total 288 (delta 34), reused 102 (delta 22), pack-reused 0
오브젝트를 받는 중: 100% (288/288), 146.48 KiB | 287.00 KiB/s, 완료.
델타를 알아내는 중: 100% (34/34), 완료.
=> Compressing and cleaning up git repository

=> Appending nvm source string to /root/.bashrc
=> Appending bash_completion source string to /root/.bashrc
=> Close and reopen your terminal to start using nvm or run the following to use it now:

export NVM_DIR="$HOME/.nvm"
[ -s "$NVM_DIR/nvm.sh" ] && \. "$NVM_DIR/nvm.sh"  # This loads nvm
[ -s "$NVM_DIR/bash_completion" ] && \. "$NVM_DIR/bash_completion"  # This loads nvm bash_completion

[root@localhost ~]# source .bashrc
[root@localhost ~]# nvm --version
0.35.2
2. node.js 설치
- 최신 LTS 버전으로 설치 : nvm install --lts
[root@localhost ~]# nvm install --lts
Installing latest LTS version.
Downloading and installing node v12.18.3...
Downloading https://nodejs.org/dist/v12.18.3/node-v12.18.3-linux-x64.tar.xz...
##################################################################################################################################################################################################################################### 100.0%
Computing checksum with sha256sum
Checksums matched!
Now using node v12.18.3 (npm v6.14.6)
Creating default alias: default -> lts/* (-> v12.18.3 *)
[root@localhost ~]# nvm list
->     v12.18.3 *
default -> lts/* (-> v12.18.3 *)
iojs -> N/A (default)
node -> stable (-> v12.18.3 *) (default)
stable -> 12.18 (-> v12.18.3 *) (default)
unstable -> N/A (default)
lts/* -> lts/erbium (-> v12.18.3 *)
lts/argon -> v4.9.1 (-> N/A)
lts/boron -> v6.17.1 (-> N/A)
lts/carbon -> v8.17.0 (-> N/A)
lts/dubnium -> v10.22.0 (-> N/A)
lts/erbium -> v12.18.3 *
- 설치 확인
[root@localhost ~]# node -v
v12.18.3
[root@localhost ~]# npm -v
6.14.6
'IT > 기타' 카테고리의 다른 글
| [SAML Test] 3. Setup our Identity Provider (Docker환경에 설치) (0) | 2020.09.07 |
|---|---|
| [SAML Test] 1. Setup a Single Sign On SAML Test Environment with Docker and NodeJS (0) | 2020.09.07 |
| Jira API token 생성 (Issue does not exist or you do not have permission to see it) (0) | 2020.06.23 |
| Jira 설치 (docker) (0) | 2020.06.23 |
| [AWS] EC2 SecureCRT 로 접속하기 (0) | 2020.06.22 |
[Docker] mysql 설치하기
Docker 이미지 다운로드
[root@localhost]# docker pull mysql:8.0.21
8.0.21: Pulling from library/mysql
bf5952930446: Pull complete
8254623a9871: Pull complete
938e3e06dac4: Pull complete
ea28ebf28884: Pull complete
f3cef38785c2: Pull complete
894f9792565a: Pull complete
1d8a57523420: Pull complete
6c676912929f: Pull complete
ff39fdb566b4: Pull complete
fff872988aba: Pull complete
4d34e365ae68: Pull complete
7886ee20621e: Pull complete
Digest: sha256:c358e72e100ab493a0304bda35e6f239db2ec8c9bb836d8a427ac34307d074ed
Status: Downloaded newer image for mysql:8.0.21
[root@localhost ]# docker images
REPOSITORY                              TAG                 IMAGE ID            CREATED             SIZE
mysql                                   8.0.21              0d64f46acfd1        2 weeks ago         544MB
Start a mysql server instance
- docker run --name some-mysql -e MYSQL_ROOT_PASSWORD=my-secret-pw -d mysql:tag
- docker run --name some-mysql -v /my/custom:/etc/mysql/conf.d -e MYSQL_ROOT_PASSWORD=my-secret-pw -d mysql:tag
- docker run --name some-mysql -e MYSQL_ROOT_PASSWORD=my-secret-pw -d mysql:tag --character-set-server=utf8mb4 --collation-server=utf8mb4_unicode_ci
- docker run -v "$PWD/data":/var/lib/mysql --user 1000:1000 --name some-mysql -e MYSQL_ROOT_PASSWORD=my-secret-pw -d mysql:tag
[root@localhost ~]# docker run -v "$PWD/mysqldata":/var/lib/mysql --name portal-mysql -e MYSQL_ROOT_PASSWORD=password -p 3306:3306 -d mysql:8.0.21 --character-set-server=utf8mb4 --collation-server=utf8mb4_unicode_ci

ad278df3e1af9dc50649027516dd186bae914083021a692d240f9c5fa5c913aa
[root@localhost ~]#
[root@localhost ~]# docker ps -a
CONTAINER ID        IMAGE                                          COMMAND                  CREATED             STATUS                           PORTS                                              NAMES
ad278df3e1af        mysql:8.0.21                                   "docker-entrypoint.s   6 seconds ago       Up 5 seconds                     0.0.0.0:3306->3306/tcp, 33060/tcp                  portal-mysql
Mysql 접속
[root@localhost ~]# docker exec -it portal-mysql bash
root@ad278df3e1af:/#

root@ad278df3e1af:/# mysql -uroot -p
Enter password:
Welcome to the MySQL monitor.  Commands end with ; or \g.
Your MySQL connection id is 12
Server version: 8.0.21 MySQL Community Server - GPL

Copyright (c) 2000, 2020, Oracle and/or its affiliates. All rights reserved.

Oracle is a registered trademark of Oracle Corporation and/or its
affiliates. Other names may be trademarks of their respective
owners.

Type 'help;' or '\h' for help. Type '\c' to clear the current input statement.

mysql>
'IT > Docker' 카테고리의 다른 글
| [Docker] 도커 컨테이너에서 VI 사용하기 (0) | 2020.06.11 |
|---|---|
| [Docker]도커 접속 방법 (docker exec) (0) | 2020.06.11 |
| [Docker]도커 오류-Error iptables: No chain/target/match by that name (0) | 2020.06.10 |
| [Docker] 도커 설치 (CentOS 8) (0) | 2020.06.09 |
패스워드 변경 주기 삭제
chage -E -1 -I 0 -m 0 -M 99999 계정
[root@localhost ~]# chage -l root
Last password change                                    : Aug 12, 2020
Password expires                                        : Oct 11, 2020
Password inactive                                       : never
Account expires                                         : never
Minimum number of days between password change          : 1
Maximum number of days between password change          : 60
Number of days of warning before password expires       : 7
[root@localhost ~]# chage -E -1 -I 0 -m 0 -M 99999 root
[root@localhost ~]# chage -l root
Last password change                                    : Aug 12, 2020
Password expires                                        : never
Password inactive                                       : never
Account expires                                         : never
Minimum number of days between password change          : 0
Maximum number of days between password change          : 99999
Number of days of warning before password expires : 7'IT > Linux' 카테고리의 다른 글
| 리눅스 버전 확인 (0) | 2020.09.22 |
|---|---|
| CentOS 8 다운로드 (0) | 2020.06.08 |
| yum : command not found (Redhat) (0) | 2020.06.08 |
| /bin/sh^M: bad interpreter: No such file or directory 오류 발생 시 (0) | 2020.06.03 |
톰캣 불필요한웹메서드 제거
1. apache-tomcat-8.0.12/conf/web.xml 에 <security-constraint>...</security-constraint> 추가 후 톰캣 재기동
   <welcome-file-list>
        <welcome-file>index.html</welcome-file>
        <welcome-file>index.htm</welcome-file>
        <welcome-file>index.jsp</welcome-file>
    </welcome-file-list>

    <security-constraint>
        <web-resource-collection>
            <web-resource-name>Forbidden</web-resource-name>
            <url-pattern>/*</url-pattern>
            <http-method>HEAD</http-method>
            <http-method>OPTIONS</http-method>
        </web-resource-collection>
        <auth-constraint />
    </security-constraint>
</web-app>
2. 점검 방법
- telnet url port
- 아무것도 보이지 않는 상태에서 OPTIONS / HTTP/1.0 입력 후 엔터 두번 - curl
| [root@localhost ~]# curl -I -X OPTIONS localhost:18080 HTTP/1.1 403 Forbidden Server: Apache-Coyote/1.1 Cache-Control: private Expires: Thu, 01 Jan 1970 00:00:00 UTC Allow: GET,HEAD,OPTIONS Content-Length: 0 Date: Tue, 14 Jul 2020 02:14:30 GMT |
'IT > Was' 카테고리의 다른 글
| 메이븐(Maven)에서 톰캣 SSL(HTTPS) 설정 (0) | 2020.10.14 |
|---|---|
| [Tomcat]도커(Docker)에서 톰캣 설치 (0) | 2020.06.11 |
| Jboss AS 7 서버로깅설정 (0) | 2014.03.24 |
| JBoss AS 7 설치 (0) | 2014.03.07 |
| 웹로직 64비트 설치 (0) | 2014.02.10 |
Jira API token 생성 (Issue does not exist or you do not have permission to see it)
*여기에 설명이 잘 나와 있습니다 -> https://confluence.atlassian.com/cloud/api-tokens-938839638.html
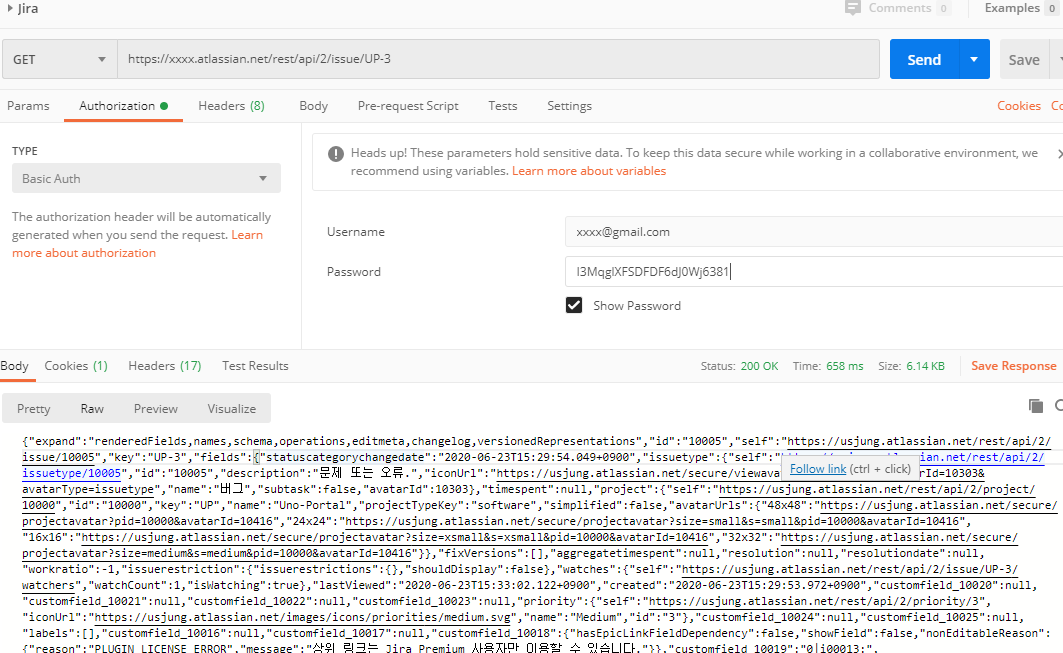
현상 : Issue does not exist or you do not have permission to see it 오류 발생함.
1. API 토큰 화면 접속 : https://id.atlassian.com/manage-profile/security/api-tokens
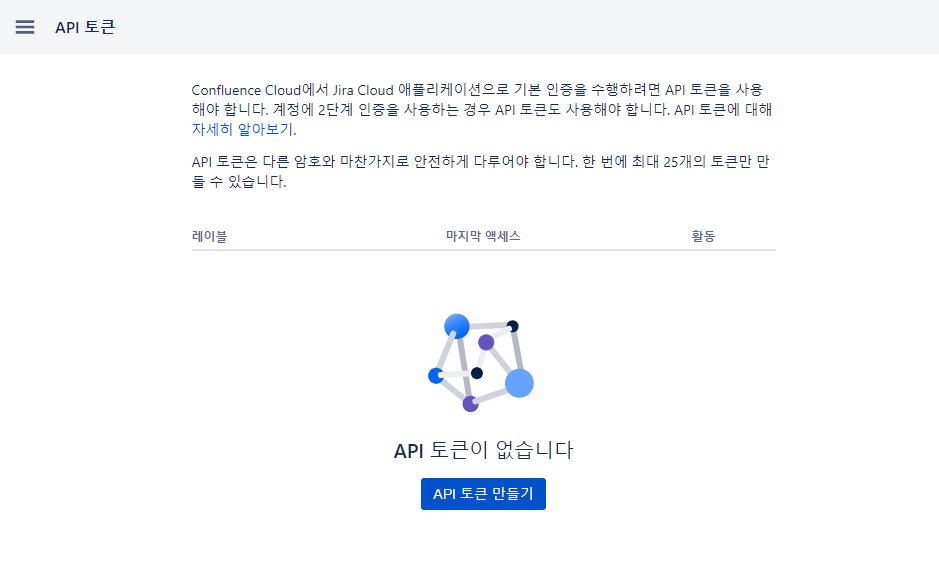
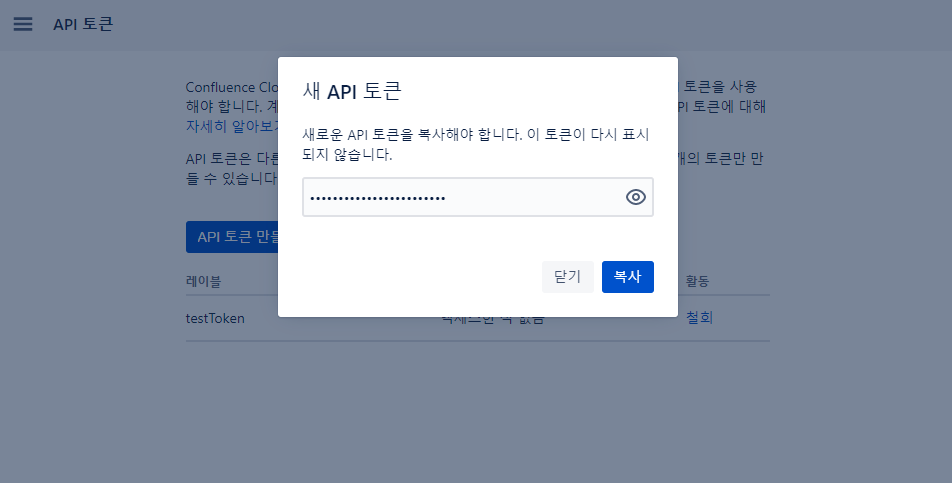
2. 토큰 생성
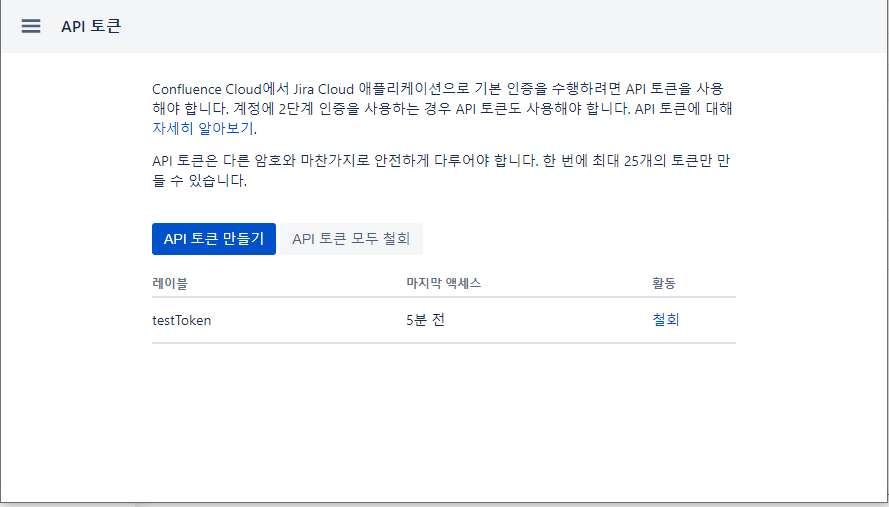
3. 토큰 조회
4. Postman 으로 테스트 (Get issue : GET /rest/api/2/issue/{issueIdOrKey})
- JIRA Server platform REST API reference : https://docs.atlassian.com/software/jira/docs/api/REST/8.4.2/?_ga=2.93052573.1639889686.1571238783-647032862.1567516016
'IT > 기타' 카테고리의 다른 글
| [SAML Test] 1. Setup a Single Sign On SAML Test Environment with Docker and NodeJS (0) | 2020.09.07 |
|---|---|
| [SAML Test] 2. CentOS 8 nvm을 이용한 node.js 설치 (0) | 2020.09.07 |
| Jira 설치 (docker) (0) | 2020.06.23 |
| [AWS] EC2 SecureCRT 로 접속하기 (0) | 2020.06.22 |
| json-server (docker) (0) | 2020.06.17 |
Jira 설치 (docker)
- OS : CentOS8
- Docker
Server : Docker Engine - Community
Version: 18.09.1
API version: 1.39 (minimum version 1.12)
Go version: go1.10.6
Git commit: 4c52b90
Built: Wed Jan 9 19:06:30 2019
OS/Arch: linux/amd64
Experimental: false
1. Jira 이미지 다운로드
[root@localhost ~]# docker pull cptactionhank/atlassian-jira-software:latest
latest: Pulling from cptactionhank/atlassian-jira-software
e7c96db7181b: Pull complete
f910a506b6cb: Pull complete
c2274a1a0e27: Pull complete
d7c1375c56aa: Pull complete                                                        126MB/380MB
7d152efddb87: Pull complete
Digest: sha256:4d21c48c3aff4649e5c3418114fcd1d18e92994d84723597289bb580951d57df
Status: Downloaded newer image for cptactionhank/atlassian-jira-software:latest
2. Jira 설치
[root@localhost ~]# docker run --name jira -itd --restart=no \
>     -p 38080:8080 \
>     -v /data/jira:/var/atlassian/jira \
> -u root \
> --env "CATALINA_OPTS= -Xms1024m -Xmx1024m -Datlassian.plugins.enable.wait=300" \
>     cptactionhank/atlassian-jira-software:latest
ca8c3e85b82437e3a45db10b229c97d511149cd5557524560d39528c1bc0654a
[root@localhost ~]# docker ps
CONTAINER ID IMAGE COMMAND CREATED STATUS PORTS NAMES
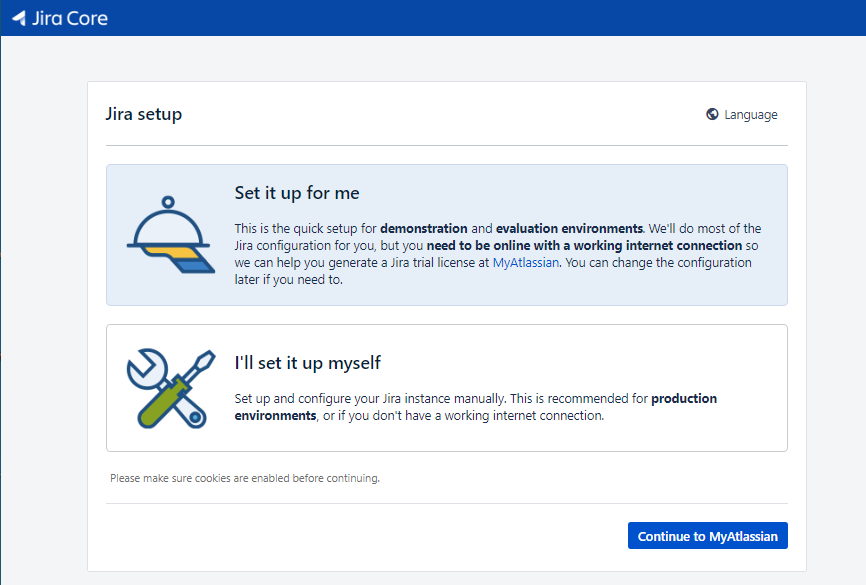
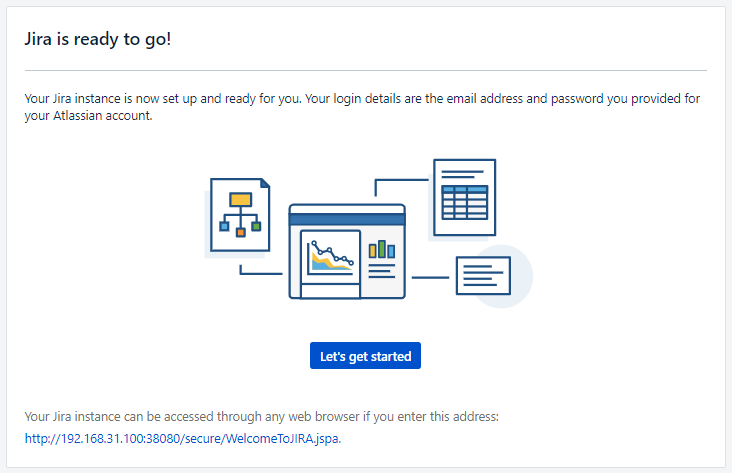
ca8c3e85b824 cptactionhank/atlassian-jira-software:latest "/docker-entrypoint. 2 minutes ago Up 2 minutes 0.0.0.0:38080->8080/tcp jira3. Jira 설치 확인. Continue to MyAtlassian 클릭.
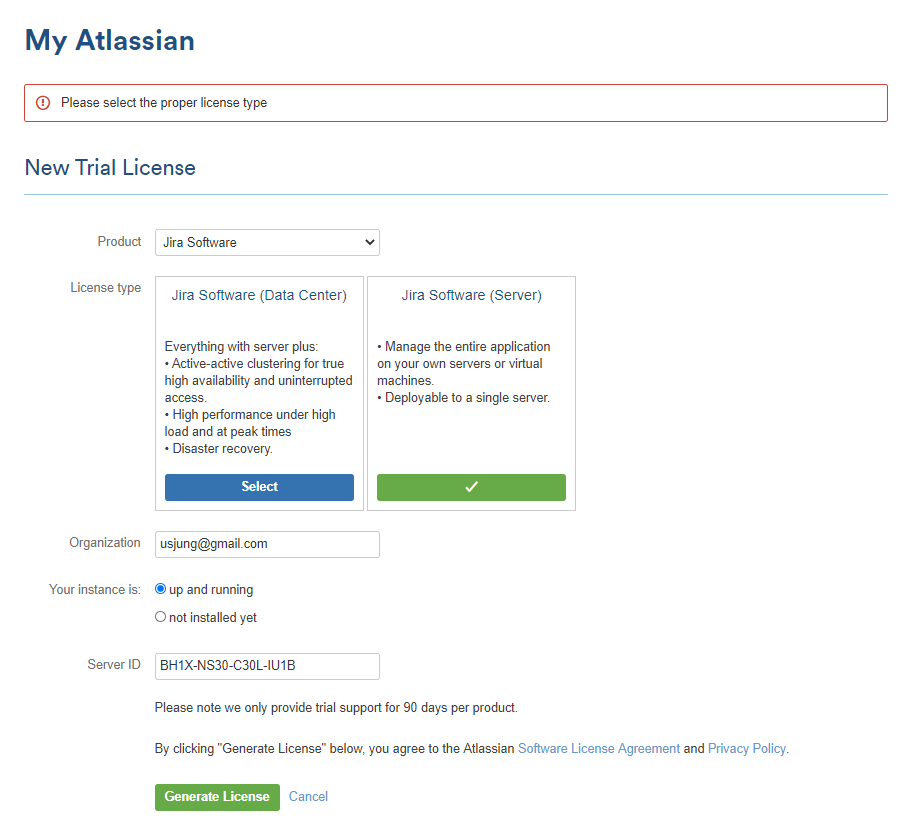
4. 트라이얼 라이센스 생성. Jira Software (Server) 선택. Generate License 클릭
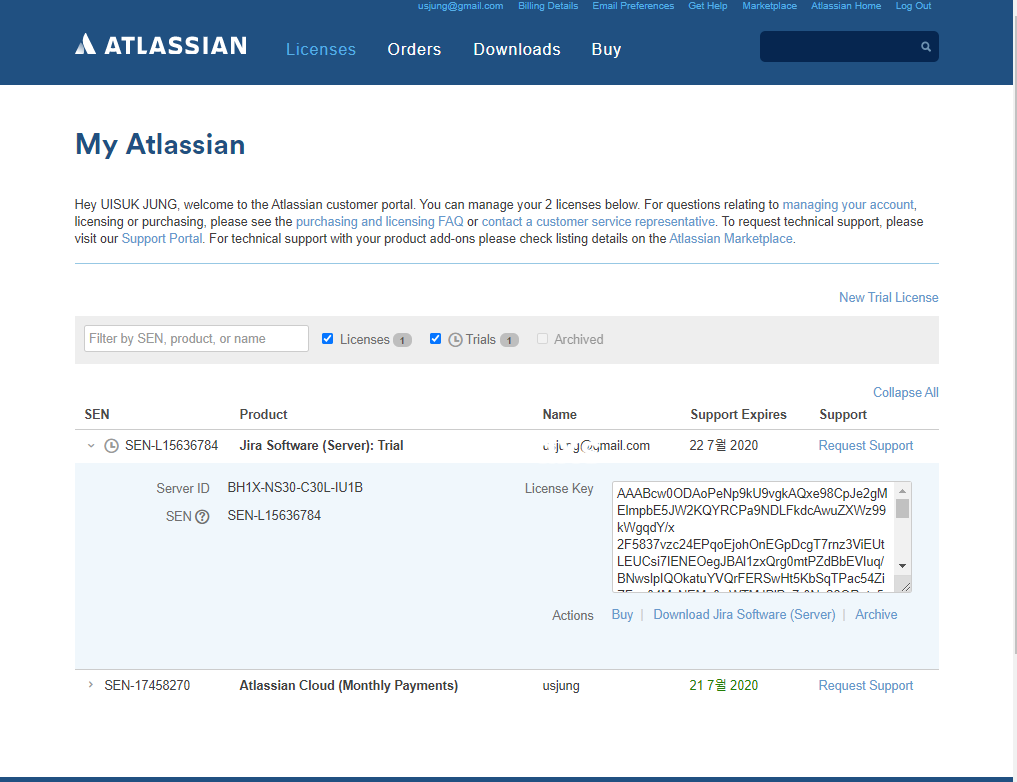
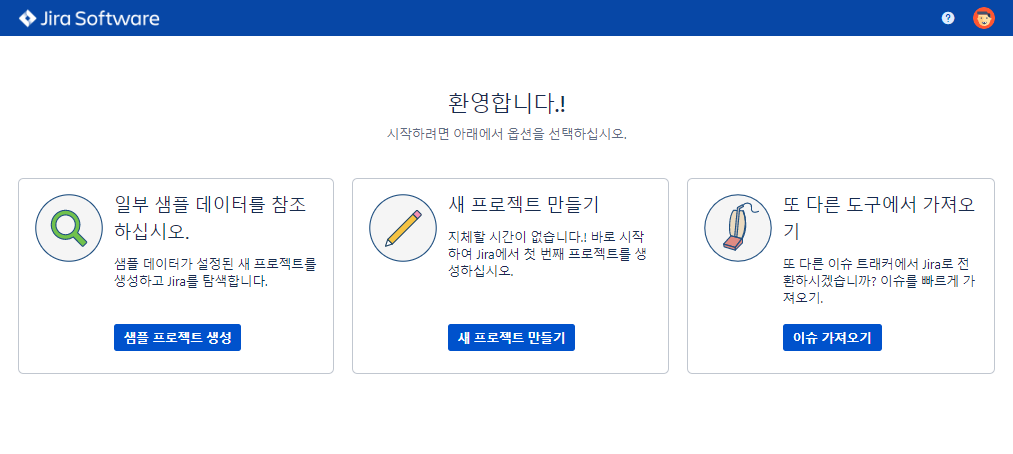
5. 완료
'IT > 기타' 카테고리의 다른 글
| [SAML Test] 1. Setup a Single Sign On SAML Test Environment with Docker and NodeJS (0) | 2020.09.07 |
|---|---|
| [SAML Test] 2. CentOS 8 nvm을 이용한 node.js 설치 (0) | 2020.09.07 |
| Jira API token 생성 (Issue does not exist or you do not have permission to see it) (0) | 2020.06.23 |
| [AWS] EC2 SecureCRT 로 접속하기 (0) | 2020.06.22 |
| json-server (docker) (0) | 2020.06.17 |
[AWS] EC2 SecureCRT 로 접속하기
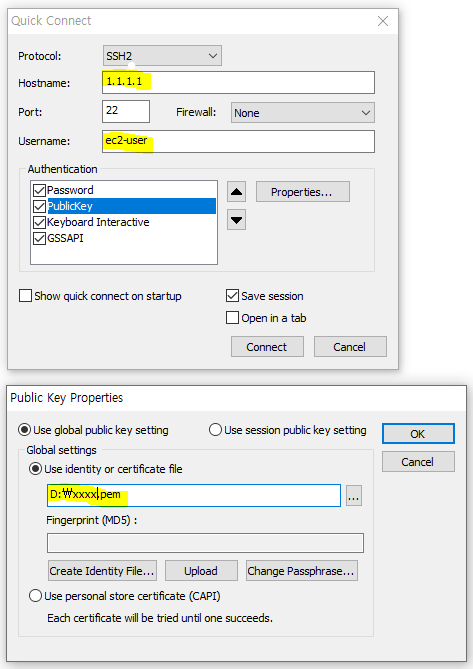
1. SecureCRT 접속
- Hostname : 퍼블릭 IP or 퍼블릭 DNS (ex: ec2-3-128-117-114.us-east-2.compute.amazonaws.com)
- Username : ec2-user
- Authentication-PublicKey-Properites...
- use identity or certificate file : AWS에서 다운받은 Pem 파일 선택
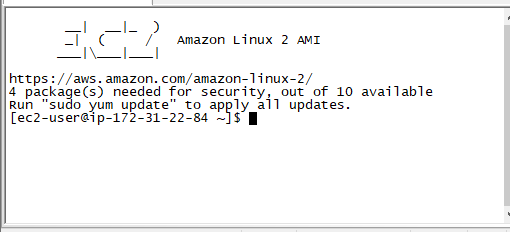
2. 접속 성공
'IT > 기타' 카테고리의 다른 글
| [SAML Test] 1. Setup a Single Sign On SAML Test Environment with Docker and NodeJS (0) | 2020.09.07 |
|---|---|
| [SAML Test] 2. CentOS 8 nvm을 이용한 node.js 설치 (0) | 2020.09.07 |
| Jira API token 생성 (Issue does not exist or you do not have permission to see it) (0) | 2020.06.23 |
| Jira 설치 (docker) (0) | 2020.06.23 |
| json-server (docker) (0) | 2020.06.17 |
